Introduction
Photography Skills: Wildlife photography is a satisfying, fulfilling, and at times frustrating, pastime. Like most photographic pursuits, there are technical skills that you will need to master, both behind the camera and behind the computer. There is also plenty of room for artistry, storytelling, and creative composition. The frustration comes in because luck plays a factor. Just because you have gone to the effort and expense of getting yourself to Africa there is no guarantee you will see the animal you hope to see, let alone seeing it do that previsualized activity you were hoping to see. All we can do is try and stack the odds in our favour by being as prepared and skilled as we can so that when that elusive moment of wildlife magic happens we are ready to take advantage of it.
This article is by no means an exhaustive guide for wildlife photography but it does contain what I consider to be key creative ideas and photographic techniques that will help you make the most of your African photographic safari. You will certainly build on these ideas with your own experiences and develop your own creative and technical style. I have tried to lay down my own views simply and clearly and I guarantee if you follow most of these principles you will be off to a flying start.
While I am framing this tutorial around African wildlife experiences (Africa is after all, the premier destination for this genre of photography) many of the idea’s will apply to wildlife anywhere in the world. Africa does have both some unique opportunities and some unique challenges that, once mastered, will leave you with great photography skills that you can put to use elsewhere.

What we all go to Africa to see.

A tranquil safari scene in Kenya
Preparation
Which Tour: Much of the information in this eBook assumes that you will be participating in a dedicated wildlife photography tour or a self-drive tour. In other word’s not a tour designed for ‘normal’ tourists who will be packed into the safari vehicles like sardines and using compact camera’s or smart phones. There is nothing wrong with a tour like that of course, but it does not provide optimal conditions for getting the best images. A photography tour will be conducted by an experienced photographer who can assist you with your skills development and provide the best locations for achieving great results. The benefits of a photography tour also extend to issues of elbow room, luggage allowances and increased opportunities for shooting at times of the day that have better light conditions. These types of tours typically cost quite a bit more but pay big dividends in terms of the images you will capture and the experiences you will have.
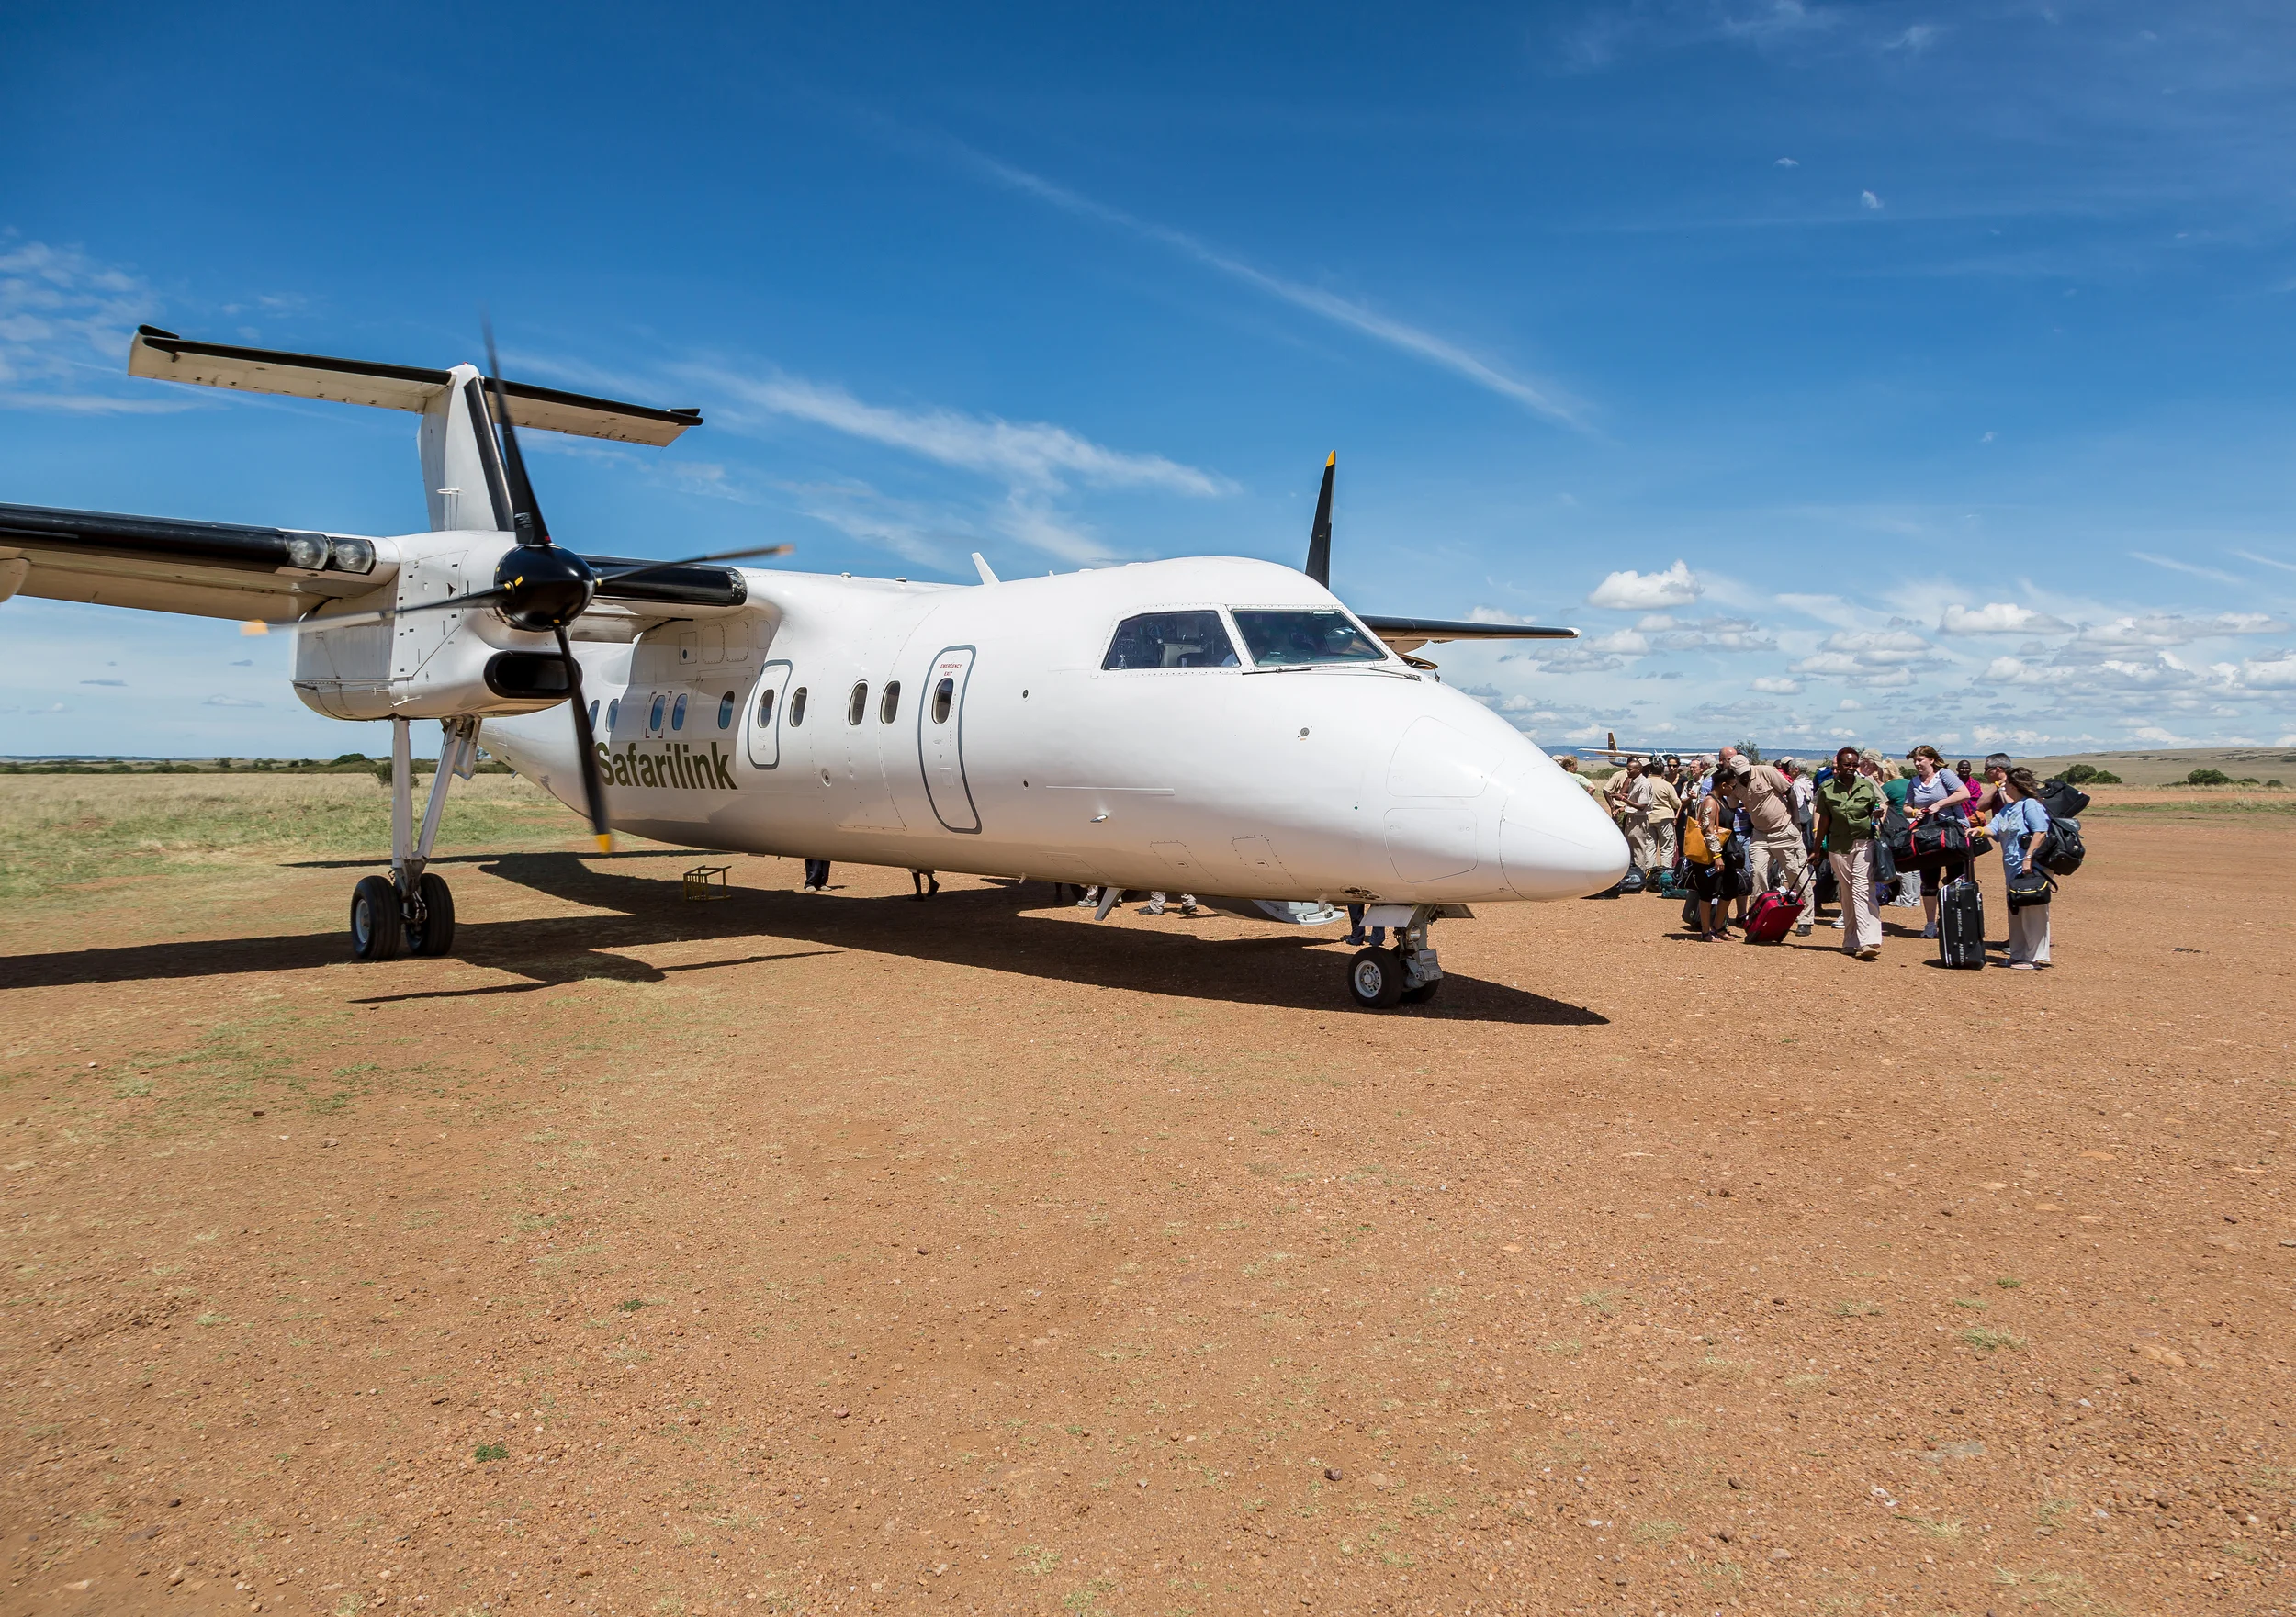
A typical example of Africa's short range air service.

Flying over Botswana.
Before You Go: This may be considered stating the obvious, but please don’t show up for the first day of your long awaited tour with new gear and no idea how to use it! A similar scenario is renting lenses or cameras for the duration of the trip without having first had the chance to use them for an extended period of time. If you make this mistake you should get plenty of help from the tour leader and by the time the tour finishes you will probably be reasonably competent. You may be ruing missed opportunities from earlier in your stay though and you will never get those opportunities again. Get your gear early and find local wildlife in your area to practice on. Over time you will build up your ‘muscle memory’ for operating all the camera functions and learn to use back button AF (see page 33). Then when you get to your destination you can hit the ground shooting. The tuition from your tour guide will solidify the techniques as you use them.
Getting Your Gear on The Plane: It’s great to have all that camera gear stashed into your backpack ready for action but you will soon realize that your bag weighs a lot more than the carry-on limit of your chosen international airline. Glass is heavy and telephoto lenses are especially dense. A regulation size pack can be overweight because of this density. Running the gauntlet in the hope that the check-in staff don’t weigh your pack is not advisable. Carry-on bag weigh-ins are becoming increasingly common and will usually be enforced. Until mirrorless or micro 4/3’rds camera systems up are up to the task of wildlife photography, we are stuck with our heavy DSLR gear and bulky telephoto lenses so a plan is required.
First, make sure your backpack itself is not too heavy. Some heavily padded camera backpacks can weigh half the baggage allowance on their own. Look for bags which have a light starting weight (less than 2kg). Put gear that you can manage without if you had to, in your check-in bag (flash, tripod, ball head) then distribute some of your carry-on items with your travelling partner if you have one. Many photographers heading to Africa with a lot of gear (myself included) will have a plan B - a photographers vest full of large pockets big enough to take a camera body or lens. It won’t win you any praise from the fashion police, but you should be able to put enough gear into it that you can get your pack down to the correct weight. Hand carrying a camera and lens over the shoulder is also an option. Putting important and expensive gear into check-in bags is not advisable due to the risk of theft or damage, but I have done so with non-critical cameras and lenses, making sure they are well padded and the bag is wrapped and security sealed.
You will also need to consider the baggage allowance of any short internal flights within your destination country. These flights may be in light planes such as a Cessna Caravan or similar which have strict total weight allowances. Hopefully your photographic tour has accounted for this and allowed an extra plane or road transport to carry extra bags. If not, your allowable luggage weight is going to be very small and lots of heavy lenses (or alternatively clothes and toiletries) might be out of the question. Research this carefully to avoid an inconvenient surprise.
Putting The Image Together
Don’t Neglect Your Subject: Your images will be more effective if the subject is clear and the viewers eyes are drawn to the point/s of interest in the frame rather than allowing them to be distracted. While shooting, consider whether the subject is the right size in the frame to suit the background. Cast your eye around the edges of the viewfinder, checking for distracting elements such as a poorly located branch. Maybe your subject’s face has a few blades of grass in front of it. Maybe the background is very busy and there is too much of it. Maybe the background is interesting and enhances the subject and you need to show more of it. Think about what impression your viewer might have from the image.
These considerations will come into play while looking through the viewfinder but they are also important while reviewing and selecting your images for processing. Sometimes a small crop can turn an okay image into a great image by improving the ‘focus’ of the image. If you have a range of images that are similar you can pick the one that has the clearest composition.
Another way of looking at this is to assess your image in terms of contrast. Contrast in terms of light is the relative difference between the lighter and darker parts of an image. Images with greater contrast tend to look sharper and more defined than images with low contrast. So think about your subject and surrounds in terms of contrast. The greater the ‘contrast’ between your subject and its surrounds the more defined the subject will be.
Minimize the Subject: Sometimes an image will tell a really good story if the subject is diminished in the image and has a low ‘contrast’ or relative scale with its surroundings. For example, a predator blending into its surroundings shows how they move through the landscape and stalk their prey. Images like this can sometimes have a very minimalist feel to them that is appealing.
Minimizing your subject can work for animal groups too. The subject may be surrounded by other similar animals and is less prominent but has become contextualized. The subject still needs to be in focus, placed in the frame with good composition and readily identifiable as the main point of interest.

Minimizing the subject but maintaining context.

Making the subject clear and present.
The Rule of Thirds Rules: The photography composition staple, the ‘rule of thirds’, might be well worn but for the most part it works. It is at the very least a starting point for every image. Take the first few shots using the rule then branch out to find other compositions that may work. The rule can apply to the position of the animal itself within the frame, the position of the eyes if it’s a portrait, the horizon level or any vertical elements like tree trunks or similar. Any significant or important features or subjects when either placed along the gridlines or on the grid intersections, even loosely, will usually provide a visually satisfying image.
Break The Rules: While the rule of thirds works well it’s not for everything. Putting the subject dead centre in the frame can create a powerful effect. Sometimes the subject may be centred but the eyes could still align with the thirds grid. This works especially well for portraits.

A perfect thirds composition just works.

A centered subject works despite not being 'thirds' framed.
Make the Subject ’Pop’: One of the curses of wildlife photography is having the most amazing animal right there in front of you, within reach of your telephoto lens but then you realize that it is positioned right in front of the ugliest, scrubbiest shrub you’ve ever seen. Stray foliage and untidy backgrounds can really distract from the hero of the image. What you really want is a way to make the subject ‘pop’ into the image and be completely separated from the background. Heaven on a shutter button is when your amazing beastie has good separation from an untidy background. With long focal length telephoto lenses, depth of field is very shallow. If you can achieve that subject separation, the background will dissolve into beautiful creamy bokeh. (Bokeh is the part of the image that is out of focus because it is beyond the lenses depth of field at a given aperture.) This works the best for close-up portraits or anywhere the environment is not attractive. Yes, all natural environments are precious and beautiful in their own way but not all of them deserve to be seen in your leopard portrait.
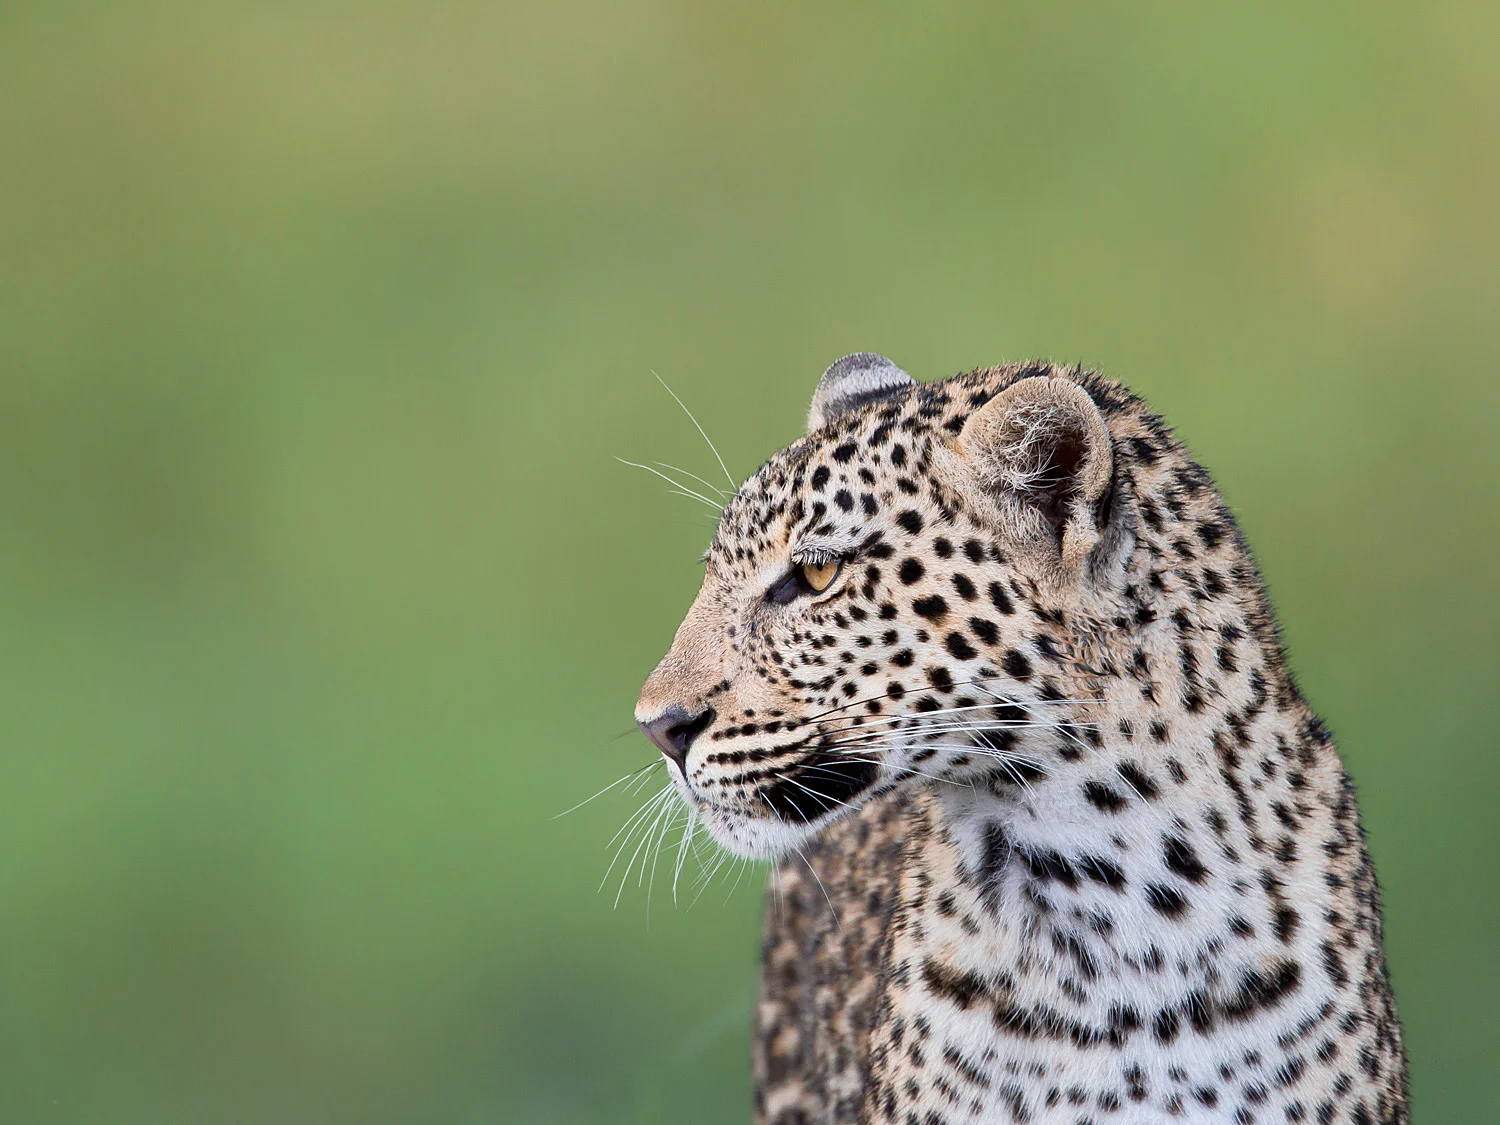
How the leopard should look - 'popping' out of the background.

The same leopard earlier on when it was too close to vegetation.
Don’t Cramp Your Subject: After applying the rule of thirds, you may end up with the animal at a one third position in the frame and some empty space in the remaining two thirds. Make sure the empty space is in front of the animal for them to ‘move into’ - or at least to ‘look’ at. If the subject is placed at one third but is facing or moving ‘out of the frame’ it can lead to the image looking unbalanced or unresolved. Or in fact it may look like what it often is - a mistimed shot of a moving animal. It pays to shoot a little ‘loose’ with your framing if the animal is moving, allowing a bit of empty space both in front of and behind the animal. You may sometimes find it easier to use the centre AF area and shoot it dead and centre of the frame then you can do a minor crop in post to remove some of that dead space from behind the animal.
Let Your Subject Leave the Frame: Having the subject ‘leaving’ the frame can work occasionally if there is a counterbalancing element or a story to be told. I’ll be honest the vulture in this image taken in Kenya was moving too quick for me and he almost escaped from the frame. However, being a good photographer is not just about getting the shot. Rating selecting, culling and editing your images is an important part of the process. When reviewing this image, I decided that, by the happy inclusion of the distant tree, the image was actually quite balanced and told a story more like where the vulture was coming from rather than what it is gliding to.

Space left in front of the baboon for it to 'move' into.
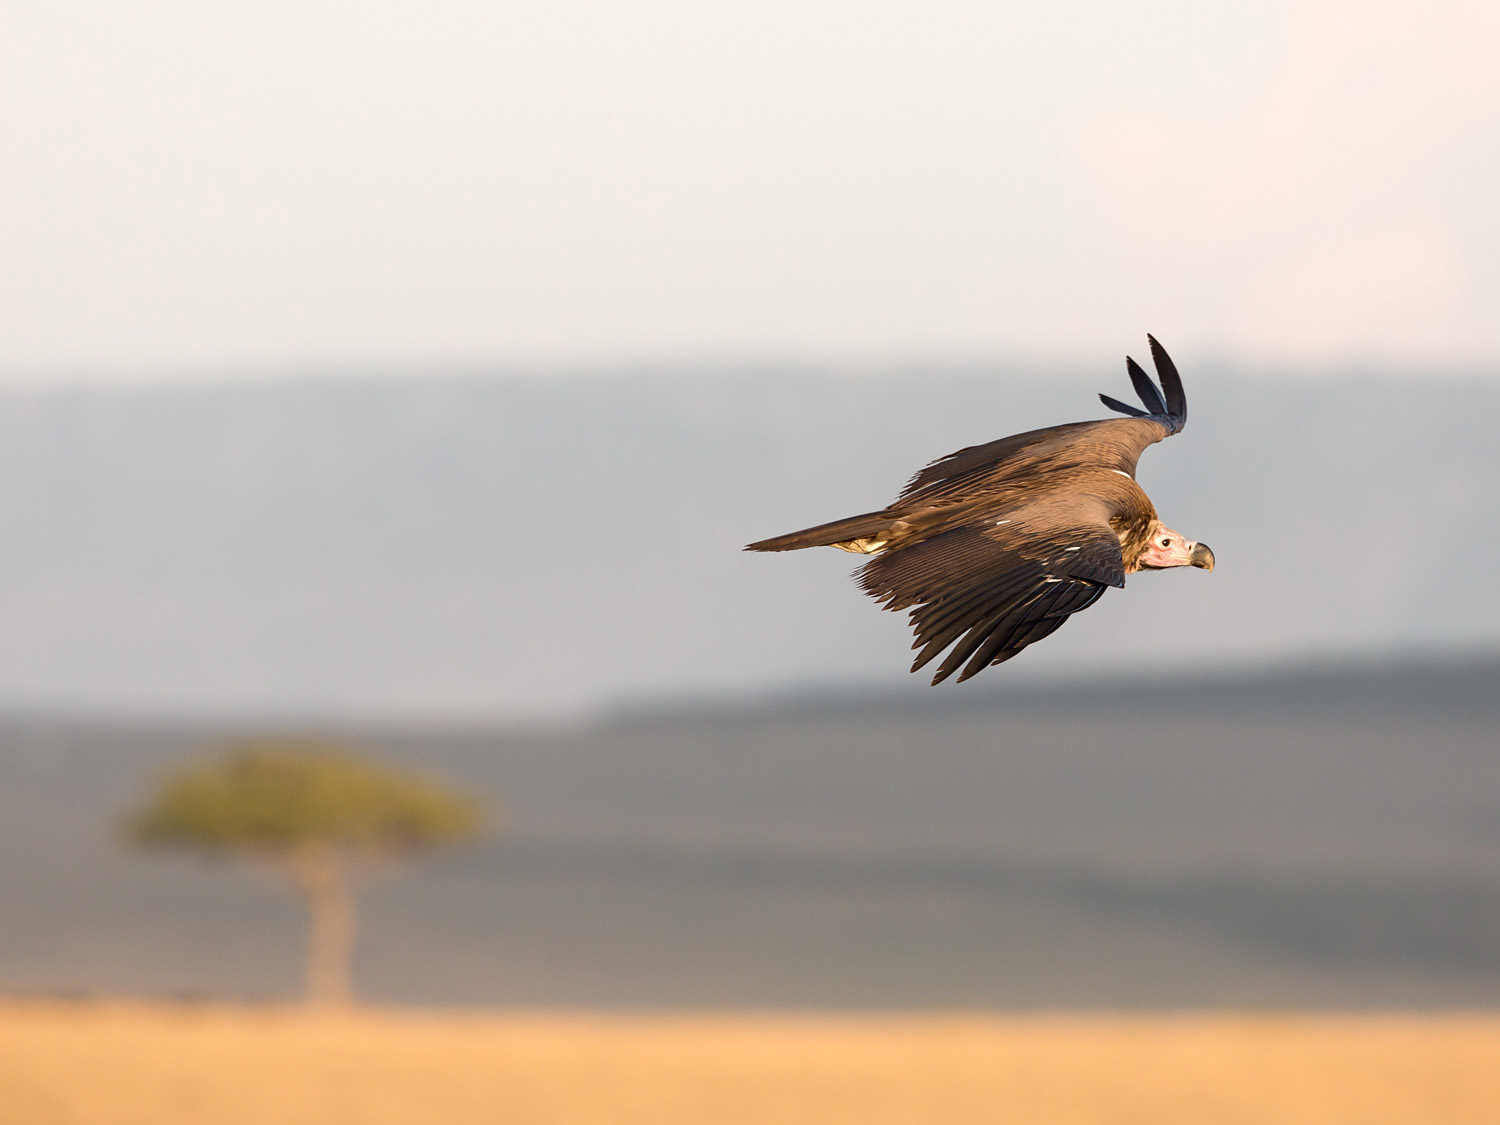
Space behind the vulture but still telling a story.
Look for Natural Framing: The surrounding elements of a subject can sometimes look like a picture frame. Use the opportunity to create unique compositions that will never be replicated. A gap in the leaves, strategically placed tree trunks, whatever happens to present itself to the observant photographer is well worth playing with compositionally to create a frame within a frame.
Animal Groups: When shooting groups of moving animals, it can be difficult to find a composition that works while looking through the viewfinder. Try focusing on a single animal, placing it to the thirds grid then shooting a series of images of that animal allowing the group to move around it. While reviewing the images later you can look for compositions that have good body positions, natural patterns or symmetry.
This image of vultures on a carcass is typical of this situation. I remember it being a seething mass of squabbling birds and flapping wings with the lone jackal fighting for its place at the table. I concentrated on getting the zebra lying flat at the bottom of the frame and watched the jackal having a go while I let the vultures swirl around, shooting quite a few frames as they did so. I chose this image because I liked the balance of the two flying birds, one with wings folded down and the counterbalancing one with the wings stretched up. There is also a single vulture dead centre who looks like he is dominating the carcass.

Framed in leaves this leopard is in here element.

A busy scene that still has some form and symmetry.
X Factor
It's All About the Eyes: “The eyes have it” the saying goes and for wildlife photography this is certainly true. Eyes breathe life into an animal photo. It doesn’t matter if your subject is partially obscured by foliage or poorly framed, if the eyes are clear and in focus the creature will at least look alive. This factor alone will not make it a great image of course but a lack of it can turn what could have been a great image into a non-starter.
The eyes allow us to anthropomorphize the animal. Humans have evolved to be very good at pattern recognition and we are especially good at reading faces. The phenomenon of pareidolia allows us to see faces and assign expressions to any ‘face like’ shape, even to inanimate objects like the front of cars or clouds. We apply the same face mapping to the features and eyes of animals but this will only work as a way of drawing your viewer into the image, if the eyes are clear and in focus. If the eyes have a catch-light even better.
This ‘facial recognition’ effect is increased if the animal is looking directly at the camera. A photo of a lion or a primate or a bird of prey looking straight into the lens, provides a particularly powerful effect as their eyes are forward facing and are more ‘face like’ than, for instance, an ungulate which has eyes either side of its head. This direct gaze creates a connection between the viewer and the image that can be very impactful. The intense stare of a lion makes you feel like you are having your very soul examined.
By default, you should be placing your focus points on an animal’s head if they are at medium or long distances. At these distances even wide open apertures should render most of the animal to be in focus but the tack sharp area should be the head as this is where the point of interest for the viewer will generally be. As the animal gets larger in the frame you can be placing the focus points on the eyes themselves.

Eyes. Enough said.

Forward facing eyes present an intimidating stare.
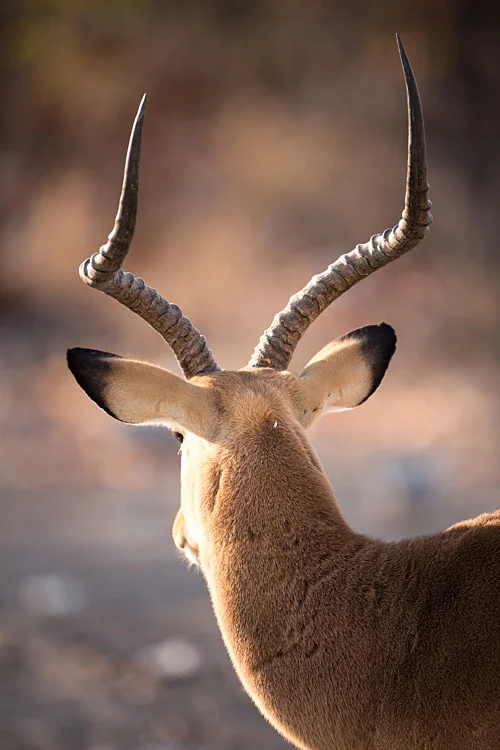
Sometimes You Don’t Need the Eyes: A photo can be powerful even if you leave out the eyes completely but it has to be with intent, not just because you couldn’t be bothered waiting a few seconds (or minutes or hours) for the animal to turn its head towards you. A strong, graphically composed, or even abstract image doesn’t necessarily need eyes to make a story. This giraffe image was made intentionally as a body only photo as he was an old bull who had clearly seen a lot of wear and tear and more than a few battles in his time. The scars and marks told the story I was after without the need to show the animals head. If I had tried to include the head and eyes in this shot the detail of the body and the point of the shot would have been lost. The impala shot was another intentionally composed image that I saw in the moment and shot instinctively. I was arrested by the striking shape the horns made from the back and the fact that one eye only is barely visible doesn’t detract from the iconic nature of the image. In fact, if the shot was made front-on the eyes would have drawn the attention not the horns, which was what I thought was the most interesting thing at that moment.
If the image is an action shot it can look alive and arresting for other reasons, even if the eyes are only barely visible or in fact not visible at all.

A story written in scars needs not eyes to tell a story.
Form, pure and simple.
Get in Close: When you’ve got a good thing in front of you, think about filling the frame with it. Using a telephoto lens to crop right in on an animal will really make its character and fine detail shine. You can do this by taking ‘portrait’ shots of large animals or frame-filling shots of small animals. Some animals (giraffe for instance) are so large that when you include the entire animal in the composition you will lose the detail in the eyes and face. Going for the portrait shot will give you that tack-sharp, up-close-and-personal frame full of wrinkles, feathers or fur.
It’s a way of seeing the ‘character’ of the animal. In the right light your photo can look like a studio portrait. Some say the animal portrait is clichéd but done well they can be truly magnetic images. A variation of the get-in-close theme is to go for more abstract frame filling images or super close up details. An elephants eye, a kaleidoscope of zebra stripes, the texture of a rhino’s hide. These are all examples of interesting images that shows the animal in a unique way that can’t be achieved with the naked eye. These opportunities will come from long telephoto lenses of 500mm and longer and the intimate distances that some animals will allow.
Go Wide: The atmospheric dawn shot, the sweeping plains filled with wildebeest, the lonely zebra on the hill crest or the flock of birds are all examples of composing a scene so that it shows the creature in its environment. This will often lead to the subject being quite small in the frame with less detail visible, so the character of the image will come more from the landscape or the composition of numerous animals than an individual subject.
This type of image can start to look more like a landscape image that features wildlife, but is a very effective technique for telling a story about the typical lives of the animals you encounter and the sort of ecosystems that they live in. It is also proof that you didn’t just go down to the local zoo to fill your memory cards!

The classic elephant eye shots shows heaps of facial character.

This 'wide' shot shows animals coming and going.
Get Low: There is a downside to photographing from a vehicle in Africa. You will usually end up shooting down on a subject from the height of the vehicle. Getting your eye-line low adds intimacy to a photo and changes the background (probably adding the ability to include sky or at least making the background appear more distant). Of course you will usually not be allowed to leave your vehicle, especially when there are dangerous animals present.
Look for lower areas of ground near your subject to park the vehicle that allows you to drop your eye line relative to the animal. If the opportunity presents itself to get out of the vehicle take advantage of it and try getting your eye line really low. To get the image of the African Python I was lying on the ground so I was virtually at snakes-eye view. The hippo image was taken while out of the vehicle, squatting near the edge of the river (being very watchful for signs of aggression from the hippos).
Another way of getting low eye-lines and unique compositions is to go to locations or lodges that provide hides at waterholes. These can be right around water level and offer chances for unique images that can’t be captured in any other way.
I have tried using a camera attached to a mono-pod with a cable release which is lowered out of the vehicle down to ground level to shoot sleeping lions and wild dogs. The results were more miss than hit but it is something that may be worth a try in the right circumstances.

A snakes eye view of snake.

Taking this image while squatting on the shore line gives a dramatic, low angle.
Review and Select for Elegance: Animals often have long legs and good looks, just like models. Also just like models, you may catch them in an ungainly pose. Hopefully if an animal is moving you are mashing that shutter button down and taking a series of images with different body postures. Go through them and pick the shots out that look nice and bin the shots where the animal looks like it has three legs or is about to fall over.
This also applies for animal groups. Avoid images where the main subject of the group is overshadowed by another animal that has awkward positioning or is overlapping the main subject in a distracting way. The arrangements of the animals within the group can also have varying degrees of ‘elegance’ or ‘order’ that can be appealing to the eye. Again this is usually a selection process you make when reviewing images in Lightroom and comparing similar images in the series.

An elegant posture that shows some movement.

This version is too stiff legged and inelegant.